

 :: MS Paint (Vista) ::
For those of you interested in filling your own S/T orders, I'm going to teach you how to tag like a pro!
First, I'd like to recommend you check out a good tutorial elsewhere. Play around in paint, start to understand the tools and how they work. If you don't want to do that, at least read THIS part about transparency. That's very important! I'll explain whatever else you need to know. Open up paint and follow along with me!
::Step One::
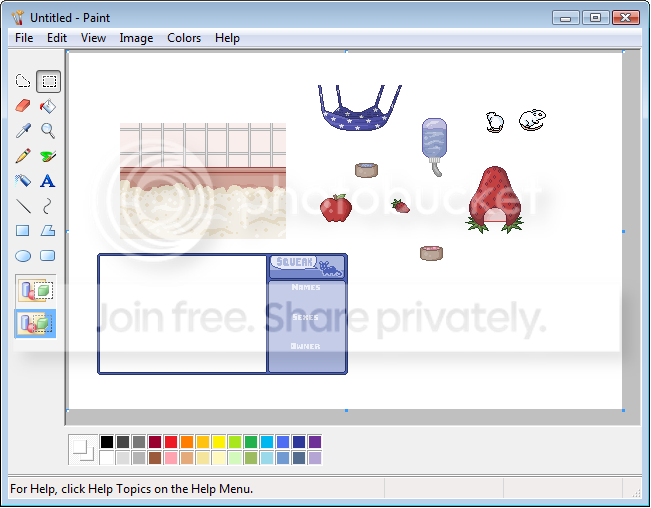
After opening Paint, ust just slap all the images you will need to tag into the program using copy and paste. The employee who quoted your order will have PMd you every image you'll need. Space them out enough that you will be able to select each one.
::Step Two::
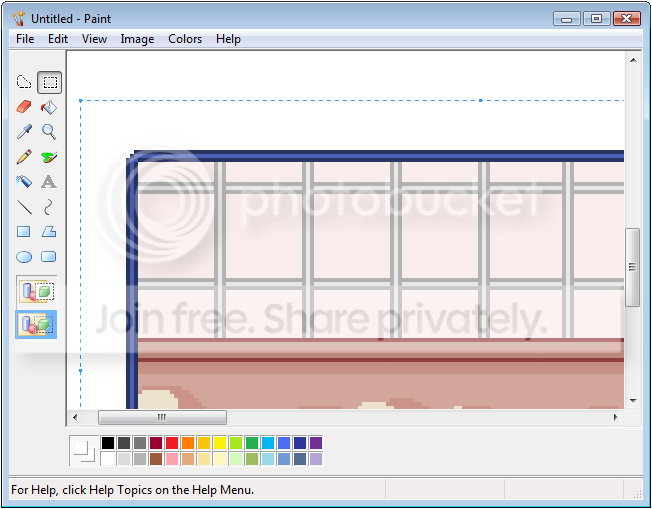
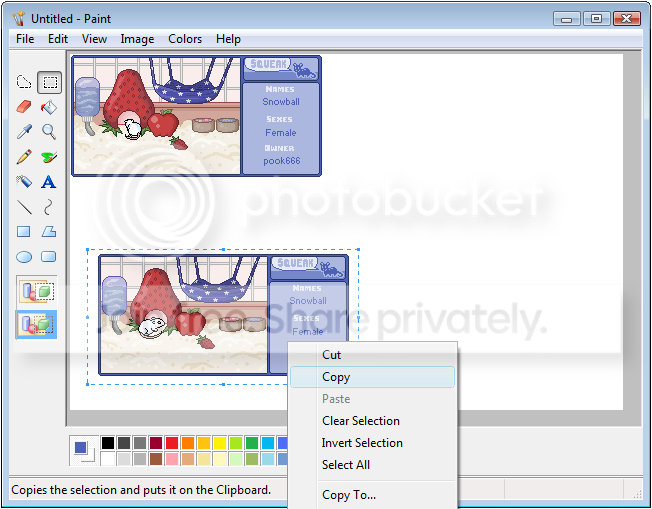
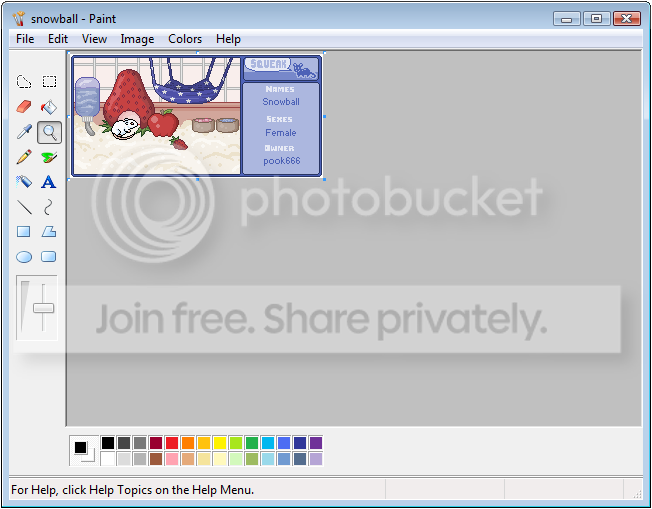
Select the cage and move it into the tag using the Select tool. For this part, you might want to zoom in (using the magnifier tool that looks like a magnifying glass) so you can be sure they're lined up correctly without any accidental overlaps and ugly white lines. The easiest way to do this, in my opinion, is to select the entire cage while you're completely zoomed out. Copy it. Zoom in on the tag, paste it, and line the cage up with one of the corners of the tag. By doing this, you know it's lined up correctly!
Make sure you're using the Select tool properly, and since you've read that link I provided earlier, you shouldn't be having any problems with transparency. If you're seeing big ugly white blotches instead of how my image looks, make sure your background (right-click) color is set to white and they bottom transparency setting (the images of shapes under the tool bar) is selected.
::Step Three::
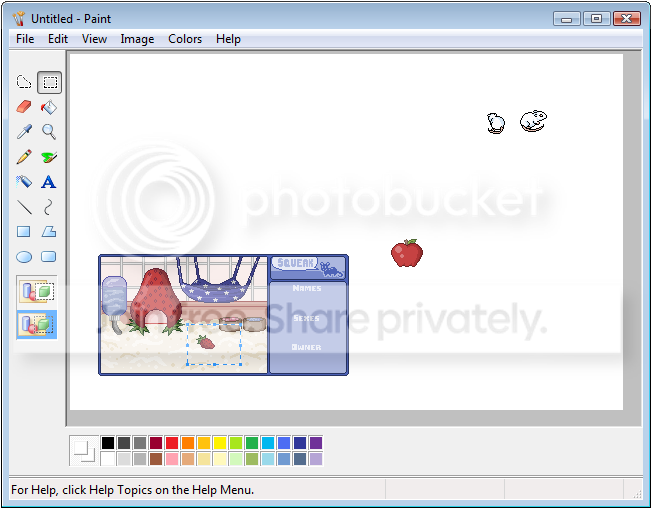
Move your accessories into place! This part's fun, and it makes each tag unique. I suggest placing the biggest, bulkiest items first, because it's easier to fit the smaller ones around them. You might also want to start thinking about where you place your rodent, although that step won't come for a while. Once you have all of your items place, we can move on to Step Four.
::Step Four::
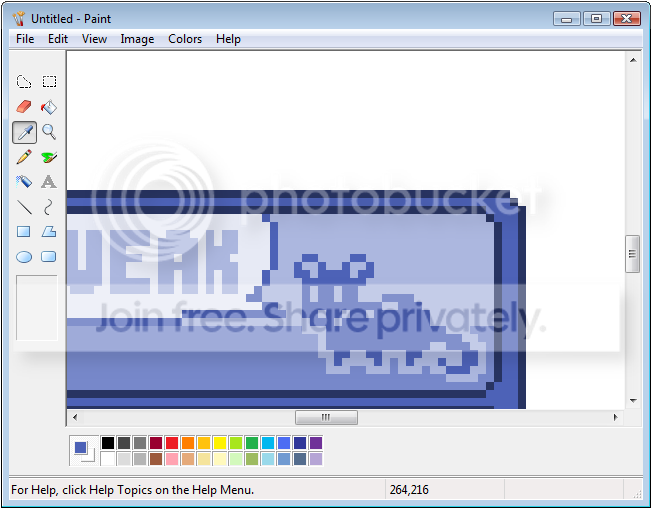
Zoom in on the squeak logo. Select the Pick Color tool (the one that looks like an eye dropper) and click on the logo's mouse. Doing this should change your foreground color to the color of the mouse, which is the colors that your tag's text should be.
::Step Five::
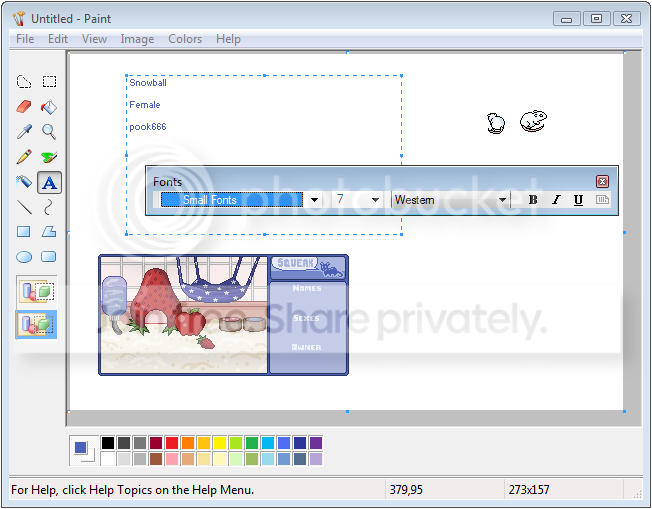
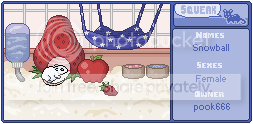
Using the text tool (the big letter A), stretch out a box for you to write your text in. Write your rodent's name, sex, and then your username, and make sure you put some space between each line or else it might be difficult for you to select the text and move it into place.
It's very important to use a small pixely font for this step, because not much else will fit with the tag. Each shop employee might use a different font for this. I recommend Small Fonts size 7, because this best fits with the tag and is one of the fonts that comes with Paint. Feel free to use anything that fits.
::Step Six::
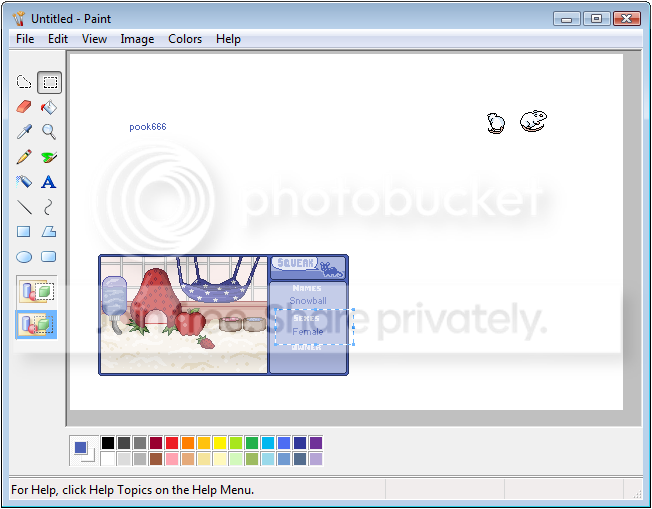
Back to our friend the Select tool. Pick up your text, just like you did all of your accessories, and place it into the tag where it belongs. I think it looks nice centered, but it's not really necessary. Once all your text is in place, it's time for Step Seven!
::Step Seven::
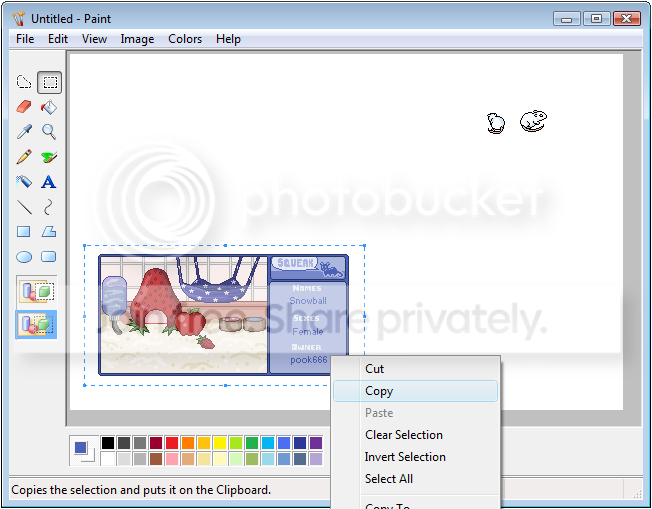
Copy your empty tag before placing your rodent. I feel that doing this is probably the easiest way to make a growing rodent without saving files separately. (Keep in mind, S/T rodents can be breedable adults if you don't feel like tagging them as a baby.) Paste a copy of your empty tag into the image.
::Step Eight::
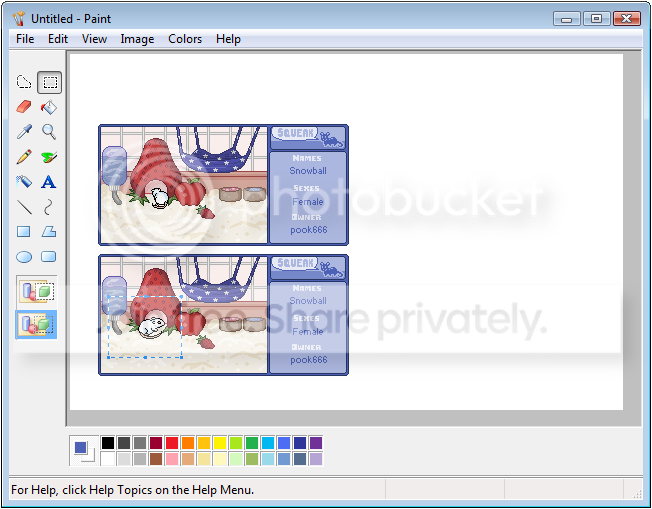
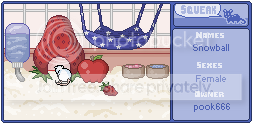
Move your rodent into its tag. If you're tagging both stages, do this once for each tag.
::Step Nine::

Move your tag into the upper left corner of Paint.
::Step Ten::
Copy the adult's tag to your clipboard! This step is crucial to growing your rodent. **Make sure you don't copy anything else to your clipboard from this point on until you finish the tagging process!**
::Step Eleven::
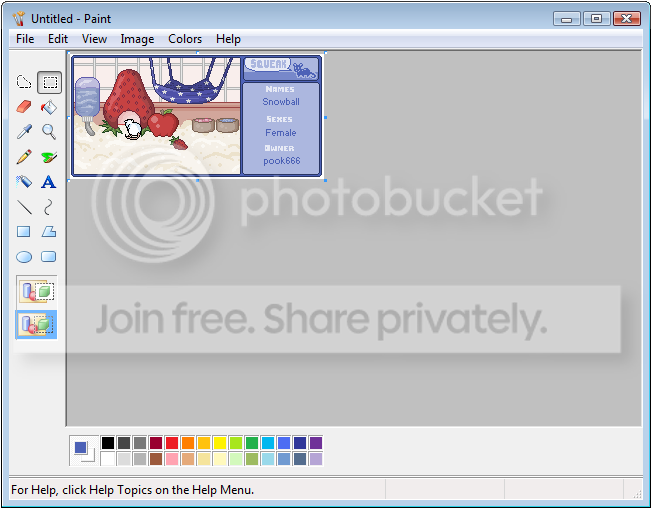
Resize your canvas so that you don't have a ton of extra white space. You do this by picking up and dragging the little blue square at the edge of your canvas.
You'll notice I just cropped out the adult tag. It's gone! But remember it's safe on my clipboard because I copied it.
This is important to cut down on file sizes. Plus, it looks nicer. You don't really want to display a rodent in your signature with a bunch of white around it, do you?
::Step Twelve::
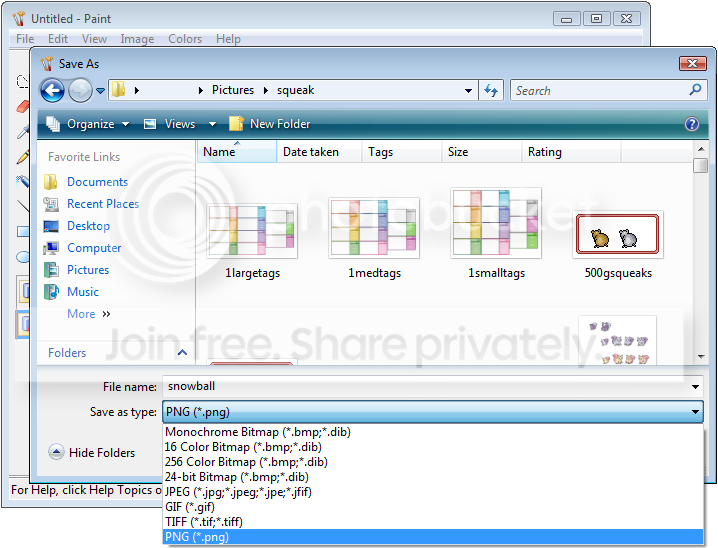
Save your rodent. Make sure you save it in a folder you'll be able to find later. I try and name my rodent files after the names of the rodents who are in the tag. This makes searching for them easier.
*****Always, always, always save your file type as .png! This isn't always the default setting, and most other file types screw up your image's quality. If you accidentally save as a .jpeg, pixels will become distorted and blurry. If you do this, you'll need to start tagging all over again! Avoid having to tag all over again by saving as a .png the first time around!
::Step Thirteen::
Upload your tagged rodent to your image host. I like photobucket best. We're not done yet though...
::Step Fourteen::
Remember how we still have the tagged adult rodent saved to our clipboard? Well, I hope you haven't copied anything else lately! (I warned you not to!) Open up your saved rodent file in Paint again. Now paste the adult tag on top of the old one. Crop like you did before, and save it once again.
::Step Fifteen::
This is it! After this you're completely done, I swear!
Once you've re-saved your rodent as an adult, you can grow it any time you like.
If you're using photobucket, you do this by deleting the old hosted image of your rodent in its first stage. Upload it again, and since you saved it as the same file, the now-grown rodent's image will take the place of the old one. The image's url will remain the same if you've done this correctly, so after a couple refreshes you will be able to see your rodent grow wherever you displayed it!
***Make sure you send your adult rodent's image to Squeak, so we can add it to the official shop photobucket! All S/T rodents must be part of the shop photobucket in order to be considered official Squeak rodents.
That's it! You're done!
You'll notice this tutorial thread is locked. If you have any questions, please post them in the Self Tagging thread!