|
|
|
|
|
|
|
|
|
 Posted: Fri Sep 23, 2011 5:05 pm Posted: Fri Sep 23, 2011 5:05 pm
A Student's Guide To Conjuring, Monsters, and other Gaia things
By Professor Mark Sarrasri, of the Gaian Extraordinary Institute of Wizardry
Contents
Chapter One: Introductions
Chapter Two: Monsters & Drops and where to find them
~ The Train Station
~ Village Greens/ Barton Town
~ Village Greens
~ Bill's Ranch
~ Zen Gardens
~ Bass'ken Lakes
~ Buccaneer Boardwalk
~ Old Aqueduct
~ Otami Ruins/Cliffs
~ Gold Beach
~ Shallow Seas (The End)
Chapter Three: Recipes For Each Year
Chapter Four: Reserved
Chapter Five: Reserved
|
 |
|
|
|
|
|
|
|
|
|
|
|
|
|
Posted: Fri Sep 23, 2011 5:11 pm
Introduction
Professor Mark Sarrasri, of the Gaian Extraordinary Institute of Wizardry, wrote this book in mind of new students. Stuffed with the Monsters of the zOMG world, along with their drops, recipes for the crafty minded, and even badges for the proud students. This Guide book is filled with everything a student might need to face the world of Gaia.
Mark is living with his pet bird, Natsume, in the Institute's paid for office in the towns. He is also seen in Shallow Seas, getting money for his many quests he has created.
Dedicated to Marinda Sarrasri, for without her, this book would have never been created.
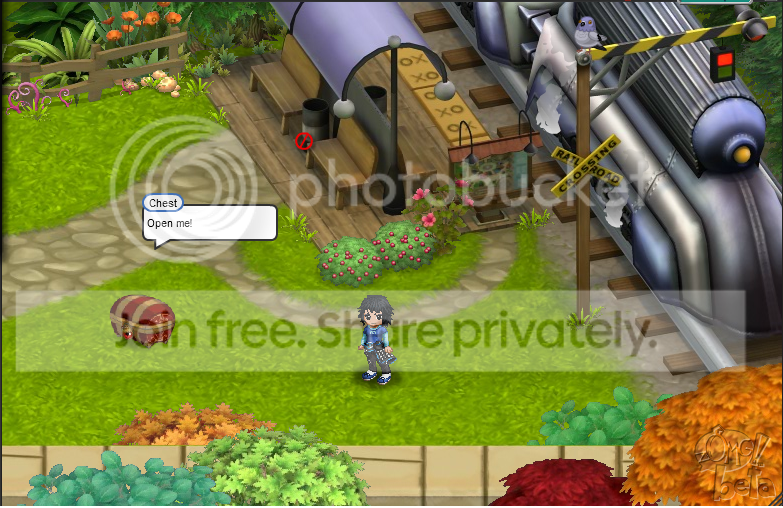
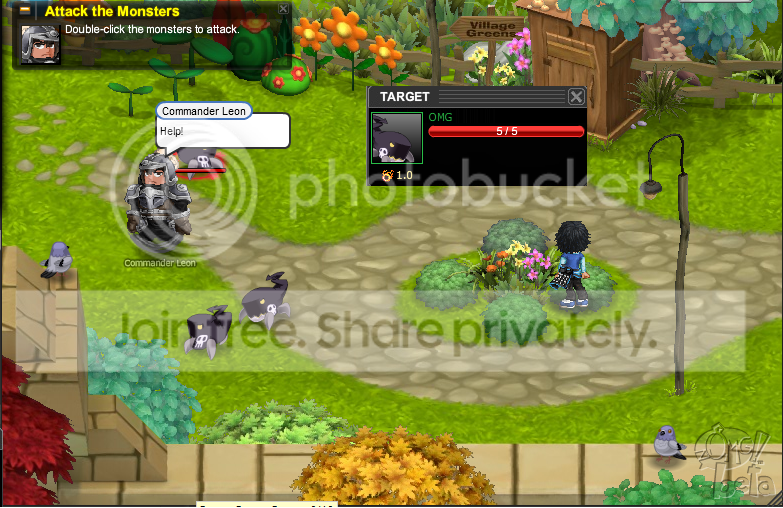
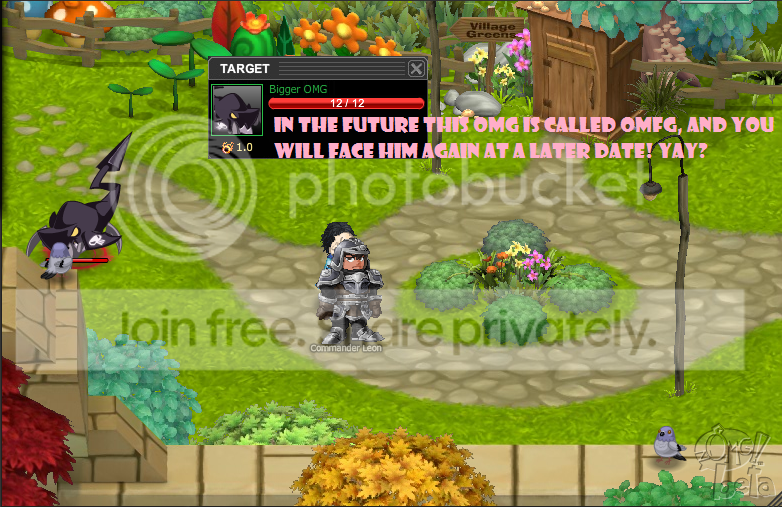
Images, ingrediant info, and anything after the Train station, is all made by and distributed by Complete Maps, Rings, Monsters, Items & More! . ONLY the Train Station images, with my Guild Mule in them, are mine. I will not and cannot claim any other images as my own.
|
|
|
|
|
|
|
|
|
|
|
|
|
|
|
|
|
|
Posted: Fri Sep 23, 2011 5:15 pm
|
|
|
|
|
|
|
|
|
|
Posted: Fri Sep 23, 2011 5:18 pm
Village Greens/Barton Town Recommend Year: 1st
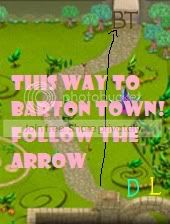
OK yes, you could skip to the next page, to the actual Village Greens, but I feel this is important for students who want badges, some extra orbs, and extra gold.
Head up north to Barton Town, following the gray path. Stop by the Null Chamber, if you want but head toward Barton Town. This link for Barton Town Quests is for your benefit.
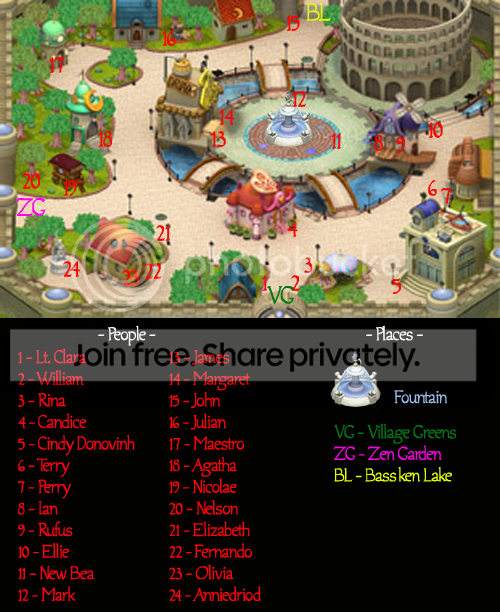
OK, as you enter, click on the giant Wheel, that looks like the Wheel of Fortune. Its a Daily Chance, or Random Chance item. You can get gold, ingredients, and avatar items. Yay, for money!
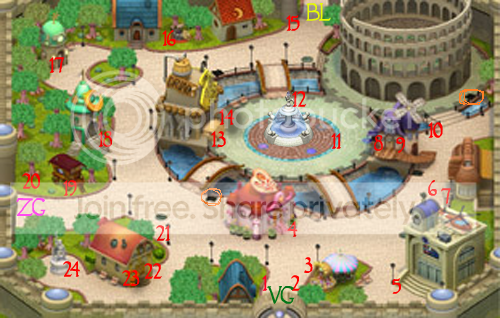
See the edited picture above? It has two places of Orange circleness. Yes its a word! Go to either place and you will enter the legendary Barton Sewers!
------------------------------------------------------------------------------------------------------------------------------
Barton Sewers Recommended Year: 1st
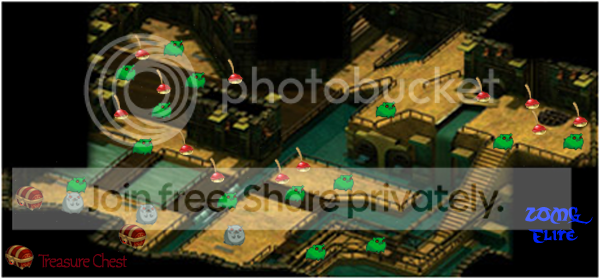
So, I was at around 8.6 when I found this place. A bit high for the Sewers. I had to go back to the Null to change my level. The max level there? Glad you asked. 2.5 CL. Yep. So you could go to the Village Greens, level up a bit, then come back. Doesn't really matter. There are some Quests here you can do, and all fairly easy.
Badge wise, there is only two here. Kill 25 Gramsters and Peelungers. Simple easy, and you get a nice amount of money from it. I believe about 1k.
Monsters:
Gramster [HP: 14] [Type: Aggressive]
Quote: Note: Will come after you if you get too close. Also stronger than Peelunger
Drop(s):  Charge Orb, Charge Orb,  Pinwheel Fin , Pinwheel Fin ,  Stem , Stem ,  Twig Twig
Peelunger [HP: 6] [Type: Smelly]
Quote: Note: Does not attack unless provoked. Does not receive help from other Peelungers
Drop(s): Charge Orb, Pinwheel Fin , Stem , Twig
Alpha Gram [HP: 25] [Type: Aggressive]
Quote: Note: Stronger than the other Gramsters. Guards the pipes for the third sewer quest.
------------------------------------------------------------------------------------------------------------------------------
No Recipes here, my students. But nice amount of gold from the quests, good chunk of Charge Orbs, and some badges. After you are done with this place, you won't have any need to go back. Unless the Gaia gods give us a event on it.
Interestedly enough, the Sewers had much more activity in Gaia's younger days, but as of right now, its only good for new students.
|
|
|
|
|
|
|
|
|
|
|
|
|
|
|
|
|
|
Posted: Fri Sep 23, 2011 5:21 pm
Village Greens Recommended Year: First
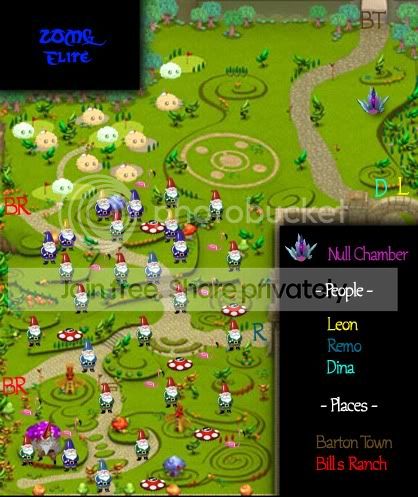
Welcome back or if you skipped the prevous pages, just Welcome!
Village Greens is a place of alot action...or it used to be.
You will start of with doing quests for Leon, and after you finish his Quests, you get a ring-possibly Bandage. Then you head over to Remo and do his quests. All in all you will have to do 11 quests here. At the end of Remo's quests, you will get to choose from a bag of Rings. I would recommend geting either Wish, Meat, Fire Rain, or Slash. But remember students its your choose!
So my students, it looks like we get our first recipes here! Dropped of course. Rings dropping here are very rare, so don't expect to see some new ones till you finish all the quests.
Animated:
Lawn Gnomes [HP: 6 - 11] [Type: Aggressive, Link]
Quote: Note: Weakest of all the gnomes and travel in packs.
Drop(s): Charge Orb, Twig ,  Screw , Screw ,  Wing Tree Leaf , Wing Tree Leaf ,  Branch Branch
Ring(s):  Ghost , Ghost ,  Slash , Slash ,  Adrenaline, Adrenaline,  Shark Attack , Shark Attack ,  Hunter's Bow , Hunter's Bow ,  Healing Halo , Healing Halo ,  Fitness, Fitness,  Mantis , Mantis ,  Keen Aye , Keen Aye ,  Gumshoe , Gumshoe ,  Improbability Sphere , Improbability Sphere ,  Shuriken Shuriken
Recipe(s):  Flower Shield Flower Shield
Badge(s):   
Lawn Gnome Major (now called Major Catastrophe, Major Tragedy, Major Disaster, Major Major) [HP: 20 - 24] [Type: Aggressive, Link]
Quote: Note: Usually travels with several Lawn Gnomes with him.
Drop(s): See Lawn Gnomes, same drops
Ring(s):  Heavy Water Balloon , Healing Halo Heavy Water Balloon , Healing Halo
Recipe(s): Same Flower Shield.
Lawn Gnome Adjutant [HP: 25] [Type: Aggressive, Link]
Quote: Note: Hangs around the general’s hut or leading a gnome squad.
Drop(s): Charge Orb, Screw , Wing Tree Leaf , Branch
Ring(s):  Hot Foot , Hot Foot ,  Iron Will , Slash Iron Will , Slash
Recipe(s): same Flower Shield
Lawn Gnome Courier [HP: 8] [Type: Aggressive, Link]
Quote: Note: Does not attack unless provoked.
Drop(s): Same as Lawn Gnomes
Ring(s): None
Recipe(s): same Flower Shield
Lawn Gnome General [HP: 228] [Type: Aggressive, Link]
Quote: Note: Boss of the Village Green. Can block attacks and shove you away.
Drop(s): Same as Lawn Gnomes
Ring(s): None
Recipe(s): Flower Shield, Lawn Gnome Hat(?), Lawn Gnome Beard(?)
If a student can verify this, but if you get a Lawn Gnome anything Recipe wise, write down the Animated you killed to get it.
More Monsters:
Pink Flamingo [HP: 6 - 11] [Type: Aggressive, Knockback]
Quote: Note: Gnome scouts. Some will run for help if attacked or if they spot you while others will attack if you get too close. Their kicks can also knock you back.
Drop(s): Charge Orb,  Pink Flamingo Feather , Pink Flamingo Feather ,  Plastic Plastic
Ring(s):  Guns, Guns, Guns , Guns, Guns, Guns ,  Fleet Feet , Heavy Water Balloon , Fleet Feet , Heavy Water Balloon ,  Hack , Hack ,  Turtle , Turtle ,  Wish , Wish ,  Knife Sharpen , Knife Sharpen ,  My Density , My Density ,  Scaredy Cat , Hunter's Bow , Shark Attack , Scaredy Cat , Hunter's Bow , Shark Attack ,  Rock Armor , Shuriken , Adrenaline, Rock Armor , Shuriken , Adrenaline,  Bandage , Bandage ,  Bump , Keen Aye , Bump , Keen Aye ,  Teflon Spray Teflon Spray
Recipe(s):  Pinwheel Pinwheel
Badge(s):   
Goof Greens Fluff [HP: 6 - 20] [Type: Link]
Quote: Note: Does not attacked unless provoked. Other Greens Fluffs will attack if nearby.
Drop(s): Charge Orb, Stem , Pinwheel Fin
Ring(s): None
Recipe(s):  Forum Badge (ED) Forum Badge (ED)
Mushroom Cannon [HP: 15 - 19] [Type: Aggressive]
Quote: Note: Does not move but can attack from a distance.
Drop(s): Charge Orb,  Copper , Copper ,  Mushroom Head Mushroom Head
Ring(s):  Defibrillate , Wish Defibrillate , Wish
Recipe(s):  Bonsai Wings Bonsai Wings
Badge(s):   
Goof Golf Course, you probably have seen the badges for it or probably wondering what it is, and how you can do it. Well, you can't. The Goof Course was taken down by the Gaia Gods, as it upset the balance of zOMG. There is an annoucement or something somewhere, but for now, ignore Goof Course. Go finish your quests and get to class!
So after you do all the quests, get as many ingrediants as you can, and maybe get a recipe or two, you are totally ready for Bill's Ranch. Congrats! You are almost done with your first year! After Bill's Ranch, you will be almost ready for your 2nd Year!
|
|
|
|
|
|
|
|
|
|
|
|
|
|
|
Posted: Fri Sep 23, 2011 5:22 pm
Bill's Ranch Recommended Year: 1st 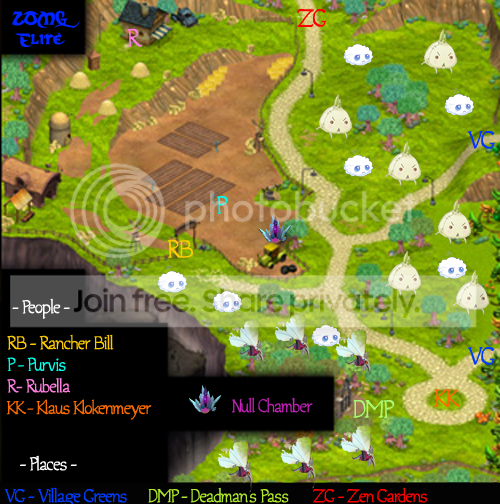
Welcome to Bill's Ranch, my students. You are at the end of your first year at the Gaian Extraordinary Institute of Wizardy. Soon you will be bumped up to 2nd year.
Good for you. But for now you must do the Quests, get the ingrediants, get new rings, and find those recipes!
The person to look for here would be Rancher Bill. He will give you rings after you do a series of quests for him. Yay. Rings I would recommend at this point? Any kind of buff. But that is what I think. Remember students, you don't actually have to choose what I say to choose!
Anyway here are the Animated for this Area.
Air Fluff [HP: 26 - 38] [Type: Link]
Quote: Note: Easiest to kill in this area and does not attack unless provoked.
Drop(s): Charge Orb,  Cotton , Cotton ,  Polyester Polyester
Ring(s):  Hornet's Nest , Teflon Spray Hornet's Nest , Teflon Spray
Recipe(s): None
Badge(s):   
Garlic [HP: 53 - 86] [Type: Aggressive]
Quote: Note: Will chase you if you get too close. Has a stronger relative called Gilroy [495 HP]. Looks just like the garlics but bigger and stronger.
Drop(s): Charge Orb,  Garlic Essence , Garlic Essence ,  Garlic Peel , Garlic Peel ,  Garlic Sprout Garlic Sprout
Ring(s): Diagnosis , Teflon Spray , Gumshoe , Keen Aye , Fleet Feet , Heavy Water Balloon Diagnosis , Teflon Spray , Gumshoe , Keen Aye , Fleet Feet , Heavy Water Balloon
Recipe(s):  Fresh Garlic Dress Fresh Garlic Dress
Badge(s):   
Alarm Skeeter [HP: 64 - 83] [Type: Aggressive]
Quote: Note: ACC debuff on target. Has a stronger relative called Cuckoo. Can be found in the same area but is yellow instead.
Drop(s): Charge Orb,  Bronze , Bronze ,  Metal Spike Metal Spike
Ring(s): Adrenaline
Recipe(s):  Mechanical Mosquito Wings Mechanical Mosquito Wings
Badge(s):   
Well for the most part this is pretty much all there is to Bill's Ranch...Oh wait, you are wondering "What about Dead Man's Pass?" Good for you to notice that my students!
Dead Man's Pass will probably be your last test as a First Year. I wish you luck!
------------------------------------------------------------------------------------------------------------------------------
Dead Man's Pass Recommended Year: 1st
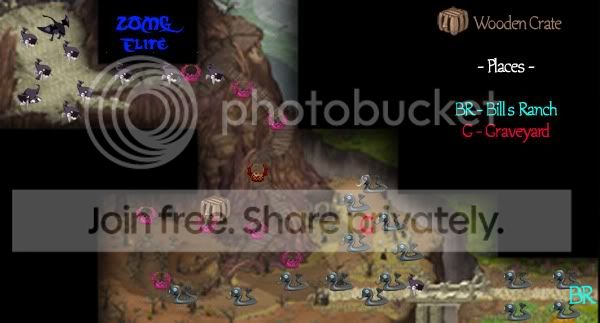
Quote: It's dark. It's gloomy. It's a twisted, creepy mountain above Bill's Ranch with a house at the top owned by an ancient family that no one sees in the daytime. It's not a popular tourist destination.
Well, that was small fry compared to Shallow Seas...But anyway. This place is fairly easy with an experienced crew member. If you need one, just pm me, I will help out any students of mine!
The Quests here are fairly simple, and easy to do. Do them and you will going on to Zen Gardens fast!
Remember your max CL here is 3.5. Can't go any higher than that. If you are, you will be down graded to 3.5.
Animated:
Laceback Bootsnake [HP: 96 - 132] [Type: Aggressive]
Quote: Note: Will attack if near and aid others being attacked. Has a medium range attack.
Drop(s): Charge Orb,  Snake Eye , Snake Eye ,  Rubber Rubber
Ring(s): Rock Armor , Shuriken , Hack , Mantis , Shark Attack , Ghost , Fleet Feet ,  Fire Rain , Keen Aye , Hunter's Bow , Fitness, Fire Rain , Keen Aye , Hunter's Bow , Fitness,  Meat , Diagnosis , Guns, Guns, Guns , Scaredy Cat Meat , Diagnosis , Guns, Guns, Guns , Scaredy Cat
Recipe(s):  Laceback Jacket , Laceback Jacket ,  Laceback Skirt , Laceback Skirt ,  Laceback Kerchief Laceback Kerchief
Badge(s):   
Laceback Galoshes [HP: 215 - 296] [Type: Aggressive]
Quote: Note: Beyond the headstones upwards a bit and appears in the upper left corner. Eyes are red/pink instead of blue. Does not always spawn.
Drop(s): Same as Bootsnake
Ring(s):  Coyote Spirit , Fire Rain Coyote Spirit , Fire Rain
Recipe(s): None
Clutch [HP: 58 - 80] [Type: Aggressive, Link]
Quote: Note: Debuffs the Dodge of the target being hit Can also be found lurking around Zen Gardens for mini event.
Drop(s): Charge Orb,  Suede , Suede ,  Clutch Claw Clutch Claw
Ring(s): Ghost , Turtle ,  Dervish , Bump , Hornet's Nest Dervish , Bump , Hornet's Nest
Recipe(s):  Clutch Purse , Clutch Purse ,  Clutch Hat , Clutch Hat ,  Clutch Rollerblades Clutch Rollerblades
Badge(s):   
Purse [HP: 131 - 180] [Type: Aggressive]
Quote: Note: Found on stairs and stronger than Clutch. Does not always spawn.
Drop(s): Same as Clutch
Ring(s): Coyote Spirit , Heavy Water Balloon
Recipe(s): Clutch Hat
OMG [HP: 99 - 139] [Type: Aggressive]
Quote: Note: Uses tail to knock you back. Ranged weapon preferred for initial attack.
Drop(s): Charge Orb,  Leather , Leather ,  OMG Claw , OMG Claw ,  Skull Patch Skull Patch
Ring(s):  Pot Lid , Adrenaline, Hornet's Nest , Turtle , Mantis , Healing Halo , Gumshoe , Shuriken , Shark Attack , Rock Armor , Pot Lid , Adrenaline, Hornet's Nest , Turtle , Mantis , Healing Halo , Gumshoe , Shuriken , Shark Attack , Rock Armor ,  Divinity , Divinity ,  Quicksand , Iron Will , Improbability Sphere Quicksand , Iron Will , Improbability Sphere
Recipe(s):  Scar of the Warrior , Scar of the Warrior ,  Scar of the Martyr , Laceback Skirt , Scar of the Martyr , Laceback Skirt ,  Forum Badge (GCD) Forum Badge (GCD)
Badge(s):   
OMFG [HP: 231 - 316] [Type: Aggressive]
Quote: Note: Bigger than OMG. Appears at the very top (one section before the OMGWTF monster and more of them when played on hard) in the lower left corner each and every time when you’re lucky enough for it to appear. Its long tail pushes you away with each strike which leaves mantis and other melee rings not very useful. Might be lucky enough to get a shot in with a melee ring before being pushed away. Ranged weapons still preferred for initial attack. Does not always spawn. Added poison DoT effect.
Drop(s): Same as OMG.
Ring(s): Shuriken , Turtle , Shark Attack
Recipe(s): Laceback Skirt , Forum Badge (GCD)
OMGWTF [HP: 896 - 1236] [Type: Aggressive]
Quote: Note: Will spawn when you touch the gate and after killing several OMG hoards. Will see the word “Attack!” six times before the OMGWTF before it appears. Crew is recommended and healing rings/items suggested. Can fear the target being hit.
Drop(s): Same as OMG, OMFG.
Ring(s): None
Recipe(s): None
Did you kill the OMGWTF? You have? CONGRATS! You have probably now upgraded your CL to 3.0+! You are now a 2nd Year!
Here are some tips: Come back a few times to Dead Man's Pass, see if any new students need help. Kill more animated for Badges. If a mini-game is going on-DO IT! Free gold, free orbs? You even can see me running around, either doing a Mini-game, killing animated, or helping out others. Mostly in Bill's Ranch though, though I do pop over to the Village Greens.
Go on to the next page for Zen Gardens, and your 2nd year at the Insititute.
|
|
|
|
|
|
|
|
|
|
|
|
|
|
|
|
|
|
Posted: Fri Sep 23, 2011 5:24 pm
Zen Gardens Recommended Year: 2nd
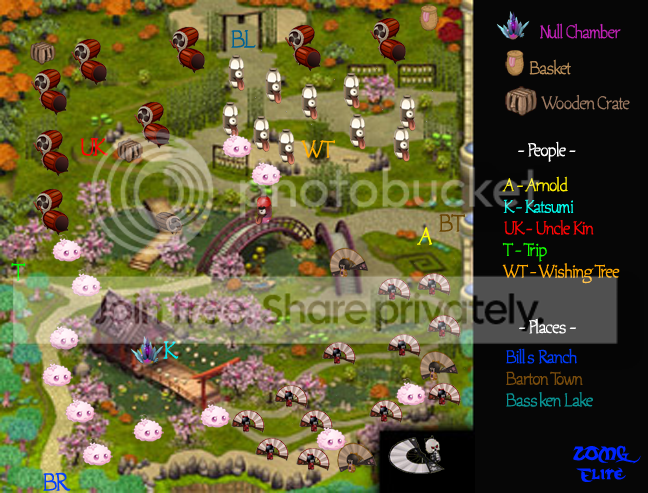
Quote: To the west of Barton Town lie the sculpted and manicured Zen Gardens, tended by a family of resident botanists and horticulturists. Koi ponds, bamboo trees and groves of lanterns surround a central contemplation shrine. Famed throughout Gaia, these Gardens are a well-loved tourist destination. The woods they border to the west are dense thickets that few people have a reason to brave. The road leading west is the way to Durem.
Yes, in the words of the zOMG wiki page, Zen Gardens is a place of relaxation, harmony, and tourism. As you read that, I hope you thought, "Pfft, ya right, what is wrong with the place?" If you did, congrats! Like Bill's Ranch, this place is over run by the Animated, and the only NPCs here are the guards and the two people living there-Katsumi and Uncle Kin. Durem isn't open to the public yet-something about the Animated being blown up or something to that affect.
This place, when I first came here freaked me out. By this time, my survival instincts kicked in and I ran to Katsumi as fast as I could. I was really low in CL and wasn't prepared for the Animated here. If you were like me, you found that where Katsumi was "hiding" was by the Null Chamber, along with a barrier that protected the Shrine from animated.
Yay, for protection! Anyway, the Quests here aren't too bad, if you are well in your training. There is also another opportunity to be in a crew, and at the end of Katsumi AND Uncle Kin, you will get to choose some rings!
By this time, I would recommend, any buffs, Meat, Wish, Hot Foot, Dervish, and/or Scaredy Cat. You probably seen at Dead Man's Pass, yourself running away, rings unable to use, and with a cat-looking thing shadowing you. That's Scaredy Cat. But remember students, not all animated can be caught with Scaredy Cat, sometimes they just get pissed off at you and try to kill ya. Friendly warning.
Animated:
Ghost Lantern [HP: 155 - 172] [Type: Aggressive]
Quote: Note: Reduces your Weight, making it much easier to knock you back a long way. Only spawns at night around the paper lanterns.
Drop(s): Charge Orb,  Silk , Silk ,  Night Fire , Night Fire ,  Wood Piece Wood Piece
Ring(s): Defibrillate , Mantis , Hot Foot , Turtle , Adrenaline, Iron Will
Recipe(s):  Forum badge (GD) , Forum badge (GD) ,  Kokeshi Kimono Kokeshi Kimono
Badge(s):  
Ghost Lantern Nexus [HP: ???] [Type: Aggressive]
Quote: Note: Only spawns at night and only after completing the first two bridges of the Battle of the Bridges quest. Will turn red when attacking.
Drop(s): Charge Orb
Ring(s): None
Recipe(s): None
Kokeshi Doll [HP: 76 - 86] [Type: Short Range, Projectiles, Link]
Quote: Note: Does not attack unless provoked and can attack from a distance.
Drop(s): Charge Orb,  Fan Edge , Fan Edge ,  Fan Wood , Fan Wood ,  Mystic Weave Mystic Weave
Ring(s): Fitness, My Density , Iron Will , Hornet's Nest , Hunter's Bow , Hack , Wish
Recipe(s):  Kokeshi Fan Kokeshi Fan
Badge(s):  
Kokeshi Collectible [HP: 238] [Type: Aggressive, Short Range, Projectiles, Link]
Quote: Note: Will attack if you get too close. Beware the ‘Boom’ attack. Dodge Debuff on target.
Drop(s): Charge Orb, Fan Edge ,  Lacquered Wood Lacquered Wood
Ring(s): Bump
Recipe(s): None
Taiko Drum [HP: 173 - 216] [Type: Aggressive, Knockback]
Quote: Note: Can hit several people at once with attack. If at a distance, will try to jump on you and knock you back. ACC Debuff on target.
Drop(s): Charge Orb,  Music Note , Lacquered Wood , Bronze Music Note , Lacquered Wood , Bronze
Ring(s): Coyote Spirit, Improbability Sphere , Slash , Rock Armor , Pot Lid , My Density , Teflon Spray , Heavy Water Balloon ,  Duct Tape Duct Tape
Recipe(s):  Taiko Drum Taiko Drum
Badge(s):   
Taiko Drum Nexus [HP: ???] [Type: Aggressive, Knockback]
Quote: Note: Stronger than the Taiko Drum, they are harder to hurt and has a longer range of attack. Only spawns for the Three Bridges quest along with several normal Taiko Drums. Crew recommended.
Drop(s): Charge Orb, Music Note
Ring(s): None
Recipe(s): None
Cherry Fluff [HP: 81 - 99] [Type: Link]
Quote: Note: Tough little fluffs and hits just as hard. Others will come to help if nearby. Seems to do more damage when they explode after being killed.
Drop(s): Charge Orb,  Pink Fluff , Pink Fluff ,  Lace , Lace ,  Thread Thread
Ring(s): Ghost , Slash , Mantis , Pot Lid , Adrenaline,  Taunt , Shuriken , Rock Armor , Fitness Taunt , Shuriken , Rock Armor , Fitness
Recipe(s):  Sakura Fluff Plushie Sakura Fluff Plushie
Badge(s):   
Think all this animated here is hard? Continue on to the Kokeshi Grove, where your first test as a 2nd Year lies.
------------------------------------------------------------------------------------------------------------------------------
Kokeshi Grove Recommended Year: 2nd

Silence here rains...for a moment, then a horde of Kokeshi Dolls and Bomb Sakura Fluffs come to attack you. From what I hear, on easy, you can do it on your own. I just say, if someone is looking for a crew for this place, JOIN THEM! At this point in time, you can get alot of money here.
The highest CL here is 4.0, and its a great place to really get into a crew. While DMP was a follow the path to the top of hill to kill evil OMGWTF, this place you have to wait for the Animated to come.
Again, if you need some help, pm me. I am willing to help out anyway possible! The final boss is a gray Kokeshi doll. This Doll is special because it used to be Katsumi's. From what I can understand from Katsumi's....ranting, is that her doll became one of the animated, which made other Kokeshi Dolls. Mass breeding-thats what I hear. Anyway, you have to destroy her precious doll, so they can figure out how her one doll got all the other dolls to be animated...
Well, just destory the doll and continue on.
Animated:
Kat's Kokeshi Doll [HP: 874 - 1182] [Type: Aggressive, Link, Short Range Projectiles]
Quote: Note: New area created for Kat's Kokeshi Doll. Must now be no higher than Cl 4.1 to enter. New updates now allow area to be beaten. The more in your crew, the more dolls spawn making it harder to stay alive at a 4.1 cl but can now be done with full crew within 30-45 minutes. Can now be beat solo.
Drop(s): Charge Orb, Lacquered Wood
Ring(s): None
Recipe(s): None
I believe you have already found Uncle Kin, if not, you will now. You have now passed Zen Gardens! Yay! You have gathered a good chuck of recipes, ingrediants, rings, orbs, and gold. You have gone to the Null Chamber to level up, and you are probably be at 4.2-5.0. If you are in that range, get a buddy (or not-you will just have to RUN LIKE HECK next), and head toward Bass'ken Lake.
Your first herdle as a 2nd year is complete, but your journey with the Institute is not. Don't forget to head to classes, sign up for Events, and talk to your professors.
|
|
|
|
|
|
|
|
|
|
|
|
|
|
|
Posted: Fri Sep 23, 2011 5:31 pm
Bass' ken Lakes Recommended Year: 2
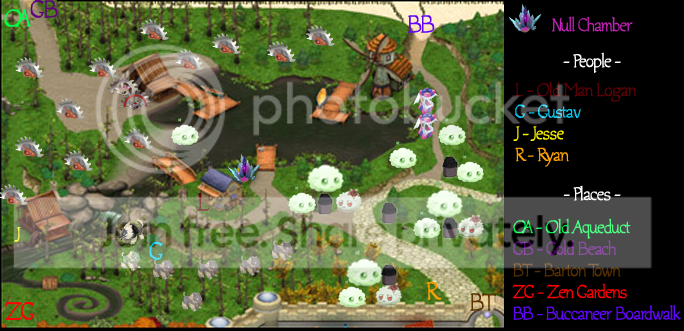
Quote: The home of some mighty fine fishin', Bass'ken Lake was once a thriving lumber camp. The old lumber mill there has been closed for some time, but "The Old Fishing Hole" general store is still open, mostly due to the efforts of its tough and crusty proprietor.
When you are as high as level as I am (10.0 Cl), coming here is tranquil. Coming here as a 2.5? Hell. Ya, I was totally not ready for the Lakes. But, students, you should be around 4.5+. You should be totally OK here.
The first things you see is a wolf-like thing. Or aka a Outlaw Pup. They will attack in packs, so prepared to run like Hell to the Null or you will die fast. Make sure you know where the Null is, so you won't wonder round lost.
Animated:
Outlaw Pup [HP: 168 - 176] [Type: Aggressive]
Quote: Note: Will roam by itself or in packs. Ones found near the Shewolf den will run for help.
Drop(s): Charge Orb,  Stitches , Stitches ,  Cured Hide , Cured Hide ,  Axe Head Axe Head
Ring(s): Diagnosis , Wish , Turtle , Taunt
Recipe(s): Scar of the Tyrant , Scar of the Tyrant ,  Bass'ken Claws Bass'ken Claws
Badge(s):  
Outlaw Wolf [HP: 431] [Type: Aggressive]
Quote: Note: Bigger than the pups, can be found guarding the Shewolf den. Killing the Outlaw Wolf will allow you to enter the den. The bite is ugly and causes a short DoT after the main damage.
Drop(s): Charge Orb, Stitches , Cured Hide
Ring(s): None
Recipe(s): Same as Pup
------------------------------------------------------------------------------------------------------------------------------
So as you leave this place, you come to the fluffs.
Animated:
Grass Fluff [HP: 138 - 154] [Type: Link]
Quote: Note: Only attacks if provoked but will attack in hordes. Mother Fluff packs may assist if nearby. Can be found roaming around or by banging the trash cans.
Drop(s): Charge Orb,  Foam Sponge , Stem Foam Sponge , Stem
Ring(s): Shark Attack , Dervish , Fire Rain , Shuriken , Diagnosis
Recipe(s):  Life Jacket , Life Jacket ,  Clover Fluff Plushie Clover Fluff Plushie
Badge(s):   
Mother Fluff Guard [HP: 312 - 341] [Type: Link]
Quote: Note: Stronger than Grass Fluff and usually found guarding the Mother Fluffs. They hit harder now *and* they can heal their allies.
Drop(s): Charge Orb, Stem
Ring(s): none
Recipe(s): Same as Grass Fluff
Mother Fluff [HP: 2354 - 2675] [Type: Link]
Quote: Note: Stronger than the rest and travels with three. Now has three different ones (Goosey, Lucy & Mary Bussey) with Mary Bussey being the strongest, crew recommended.
These mama's pack a punch. I remember seeing them and thinking to myself-Ah fluffs, it maybe bigger but should be easy to kill at this point! I was totatlly wrong. I was died within seconds. I had to go to the Null. So don't underestimate them
Drop(s): Charge Orb, Foam Sponge , Stem ,  Ring Polisher Tube Ring Polisher Tube
Ring(s): None
Recipe(s): None
------------------------------------------------------------------------------------------------------------------------------
So past these fluffs, and you might see a fellow Student kicking some trash cans around. Watch them for a few seconds and you will see a weird thing happen. A fluff pops from the forest, swearing it head off. (Well bleeping its head off-They are a very...wordy species). Its a Carrion Fluff. And if you are not prepared for them, they can be trouble.
Animated:
Carrion Flower Fluff [HP: 206] [Type: Aggressive]
Quote: Note: Can be found by banging the trash cans around and seen using profanity. Slows the footspeed of targets.
Drop(s): Charge Orb,  Suspender , Suspender ,  Lure Lure
Ring(s): Hunter's Bow , Duct Tape , Diagnosis , Scaredy Cat , Adrenaline, Meat , Iron Will , Pot Lid
Recipe(s):  Shovel Blade Shovel Blade
Trash Can [HP: 840 - 880] [Type: n/a]
Quote: Note: Knock over trash cans to lure out Carrion Fluffs. Trash cans do have names, For a Greener Tomorrow, For a Burpa Shave, ...Takes More Nerve..., Give a Hoot! Don’t Pollute!
Badge(s): 
------------------------------------------------------------------------------------------------------------------------------
Head over to Logan to get started on your Quests. After doing all his quests, again you get your chose of rings. Here, again, I recommmend any buffs, especially Healing Halo and My density. If you don't choose those, TAKE DEFIBRILLATE! It revives a fallen student, and if you have one at this point, you will be able to go farther and faster than I did.
I didn't know about Defibs (its nickname) till Okami Cliffs, which by that time was a little late. Anyway.
Logan will at one point, tell you to go to the Windmill. Here you will find the Flying Giftboxes.
Animated:
Flying Giftbox [HP: 522 - 557] [Type: Aggressive]
Quote: Note: Spawns in groups and only at night or if you activate the windmill device. Can fear the target being hit. Can also be found with Air Shark in Barton Town but does not count towards normal badge. Ring Boxes can still be found flying around as well.
These little buggers are hard to kill. You don't have to actually kill them to finish the quest Logan asked you to do. You can just activate the Windmill, and run like hell after you see the Giftboxes (Go to Null if you have to).
Drop(s): Charge Orb,  Cloth , Cloth ,  Ribbon Ribbon
Ring(s): Hack , Guns, Guns, Guns , Ghost , Meat , Knife Sharpen , Iron Will , Pot Lid , Slash , Turtle
Recipe(s):  Gift Box , Gift Box ,  Scar of the Rogue Scar of the Rogue
Badge(s):   
At some point in your quest journey, you will be sent to Gustav-a French woodsmen (a cliche, I kid you not). He will tell you to rescue his Mon Cheri, his beloved axe from Shewolf. My advice? Just do it. You will get a recipe out of it, and you will be able to get into the Saw Mill.
------------------------------------------------------------------------------------------------------------------------------
She Wolf Den Recommend Year: 2

A dark place where only the people of Mon Cheri's quest can enter (if you have already done it, you can re-enter). Here, again you should get a crew. If you need any help, just PM me. I will help you. Here, like in Kokeshi Grove, you will get attacked by a onslaught of Animated. Mostly Outlaw Pups and Wolves.
Then the Shewolf comes. A fiesty wolf that, with a good crew, will be easy for you to handle. This is your first test here at the Lakes. I hope you do well.
Shewolf [HP: 1982 - 2498] [Type: Aggressive]
Quote: Note: Will revive the Outlaw Wolfs you just killed to bring her out. Only appears if someone has the Mon Cheri quest active.
I wonder if there is a Hewolf...
Drop(s): Same as Outlaw Wolf
Ring(s): None
Recipe(s): Same as Pup
------------------------------------------------------------------------------------------------------------------------------
You survived? Good. Next, you will have to gather Cheri's sister's axe parts. Now, this part is totally tricky. Some parts are easy to find and some are not. YOU CANNOT BUY ANY OF THE PARTS! I know, I have tried. You literally have to find each piece. It took me about 2-3 days to find all of them.
But it reward is enough. After that, you will gain entrance to the Saw Mill. A place where many of students will go to get a quick Buck (as in Gold).
------------------------------------------------------------------------------------------------------------------------------
The Saw Mill Recommended Year: 2

Silence for but a moment. If one listens carefully, you can hear the sound of a saw whirling. Then they attack!
Animated:
Buzz Saw [HP: 150 - 160] [Type: Aggressive]
Quote: Note: Can attack from a distance. Spawns in groups of 2-5 from the sawmill. Some will run away to get help.
Outside the Saw Mill, you have probably seen these guys just whirling back and forth. Here you will be attack by them in groups. In Hard, they come at you with like 7 of them, and they don't stop! Hot Foot here is a great idea, and Scaredy Cat is awesome on these guys.
Drop(s): Charge Orb,  Iron Ore , Iron Ore ,  Saw Blade , Saw Blade ,  Aluminum Aluminum
Ring(s): Shark Attack , Meat , Hornet's Nest , Dervish , Iron Will , Bump , Mantis , Gumshoe , Fire Rain , Knife Sharpen , Heavy Water Balloon , Quicksand , Pot Lid , My Density , Fleet Feet , Taunt , Improbability Sphere ,  Solar Rays , Diagnosis , Teflon Spray , Wish , Hot Foot , Hack , Divinity Solar Rays , Diagnosis , Teflon Spray , Wish , Hot Foot , Hack , Divinity
Recipe(s):  Bass'ken Waders , Scar of the Martyr Bass'ken Waders , Scar of the Martyr
Badge(s):   
Mama Buzz Saw [HP: ???] [Type: Aggressive]
Quote: Note: Bigger and stronger than Buzzsaw, Must now be a no higher than Cl 5.0 to enter the saw mill where she is located. Crew recommended. Also has a twin sister that like to come out and play. Sister Saw be found outside of the saw mill.
On Normal and Hard, a Big Mama Saw and a Small Mama Saw. They are the pre-bosses to this place. Fairly easy to kill in a crew-two on each saw kills them fairly quickly.
Drop(s): Same as Buzz Saw
Ring(s): None
Recipe(s): Same as Buzz Saw
Papa Buzz Saw [HP: ???] [Type: Aggressive]
Quote: Note: Killing Mamma Buzzsaw tends to piss off Papa Buzzsaw who is even bigger and stronger than Mamma. Only spawns if someone around has the Papasaw quest active. Must now be a no higher than Cl 5.0 to enter the saw mill where he is located. Crew recommended.
Papa Saw. If you have been wondering what the other students mean when they yell out "2 for PS Hard!", It means they are looking for 2 more people to kill the Papa Saw (PS) on Hard. A well-managed crew will take care of this guy fairly well.
Drop(s): Same as Buzz Saw
Ring(s): None
Recipe(s): Same as Buzz Saw
------------------------------------------------------------------------------------------------------------------------------
After you have completed Gustav's quests, you should be done here at the Lakes.
But wait! Something loud and whirly is coming this way. OMG ITS A MASSIVE BUZZSAW!
Buzzkill [HP: 6521+] [Type: ?]
Quote: Note: After receiving enough damage will drill/teleport to another location on the map.
You have to be 5.0 CL to attack Buzzkill.
Drop(s):  Loose Screw Loose Screw
Badge(s):  
*Phew* Buzzkill kinda shocked me for a minute there. He can easily kill you, so be near the Saw Mill if you want a quick revival. You don't actually have to attack Buzzkill, you can just go on to the next area.
You have two choices at this point. You can go to Buccaneer Boardwalk or go straight to Old Aqueduct.
Either way, you will have to work harder than ever to survive.
|
|
|
|
|
|
|
|
|
|
|
|
|
|
|
|
|
|
Posted: Fri Sep 23, 2011 5:34 pm
Buccaneer Boardwalk Recommended Year: 2
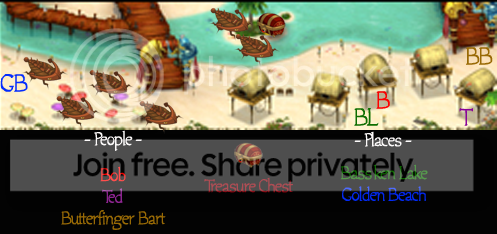
Quote: The Pirates of the Shallow Sea are starting a supposedly legitimate business venture here at the old Gambino docks, renovating the area into an amusement boardwalk. The ferry running from here to Gambino Island has been shut down during the construction.
Its a place to stop on the way to Gold Beach. In the future, you can go further into the Boardwalk, but for now, you have to buy a ticket to see the rest of it. (If you are like me, you will pester your parent or save some cash, get a Gaia Cash Card, use it on fluffs and outfits, have about 200 left over, and buy a ticket-I don't know if it was worth it yet.)
Anchor Bug [HP: 297 - 314] [Type: Ranged Attack]
Quote: Note: Can hit you from a short distance and found in large swarms. Rings that can attack more than one monster at a time recommended if by yourself.
You will see a stronger version of these guys in Gold Beach and Shallow Seas.
Drop(s): Charge Orb,  Lobster Claw , Lobster Claw ,  Brass , Brass ,  Sailor Ink Sailor Ink
Ring(s): Adrenaline
Recipe(s):  Monster Lobster Claws , Monster Lobster Claws ,  Sailor's Anchor Tattoo , Sailor's Anchor Tattoo ,  Forum Badge (QA) Forum Badge (QA)
Badge(s):   
There is actually nothing to do here, even if you do get a ticket. This place is pretty much dead. It will be more busy in the future, when the rest of the boardwalk opens. The only thing to do here is the mini-game they have which is discribed below.
Quote: Recover the KiKis! A crate of boardwalk prize giveaways (KiKi Kitty dolls) was stolen from the Pirates. These dolls Animated and are being held captive by the beach denizens of the Boardwalk (because they're so darn cute). You need to defeat the owners of the KiKis and return them to Butterfingers Bart, so he can take them back to the Pirates on the Boardwalk for their prizes. To rescue KiKi, defeat her captors and then pick her up and bring her to the location indicated on your PDA Map. To succeed at the scenario, 25 KiKis must be rescued and returned to Bart.
Gold Beach is for Year 3 Students, but if you want to die a sad death by fluffs, go head.
For now, the place to go to is the Old Aqueduct. For you sci-fi fans, its a nice place to smile at with sad sad amusement (its what I did anyway).
|
|
|
|
|
|
|
|
|
|
|
|
|
|
|
Posted: Fri Sep 23, 2011 5:37 pm
Old Aqueduct Recommended Year: 2
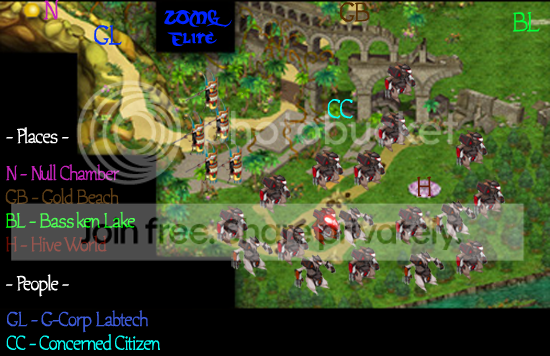
Quote: The remains of the old aqueduct that was used before the Durem Reclamation Facility was created are still present here, although dilapidated and fallen now into beautiful ruin. The jungles to the northwest stretch down this far, but have not yet fully consumed the old stones. The Zurg artifact called the Star Portal lies dormant here still, guarded by a handful of ever-present GIB agents.
This place is ok, I think. The Null is on top on a hill, and is surrounded by morons thinking aliens are coming for them. The Zurg. I have no idea what really happened here, but something did, and the GIB or Gaians in Black (MIB reference) are there to control the situation. Sci-fi fans rejoice! There are ton's of Sci-fi references here, you just have to look for them.
Second Years, this place is your final test. There is no big huge test, like the Saw Mill here. Well, there is the Hive World, but you won't get far so I wouldn't recommend actually doing it till you're a third year. Good Luck!
Predator Prairie Pup [HP: 259 - 283] [Type: Aggressive]
Quote: Note: Will attack in packs, has a ranged attack and also turn invisible. Will also follow you no matter how far you run. Can also be found lurking around the Beach now.
Drop(s): Charge Orb,  Kevlar , Kevlar ,  Damaged Biochip Damaged Biochip
Ring(s): Divinity , Hornet's Nest , Knife Sharpen , Heavy Water Balloon , Bandage , Diagnosis
Recipe(s):  Green Alien Tattoo , Green Alien Tattoo ,  Pink Alien Tattoo , Pink Alien Tattoo ,  Alien Raygun , Alien Raygun ,  Preda-Rang Preda-Rang
Badge(s):   
Predator Squad Leader [HP: 589] [Type: Aggressive]
Quote: Note: Will attack in packs, has a ranged attack and also turn invisible. Stronger than the predator pups. Can heal themselves and allies.
Drop(s): Charge Orb,  Fauxskin , Fauxskin ,  Wetware Plastic Wetware Plastic
Ring(s): Pot Lid , Turtle
Recipe(s): Preda-Rang , Alien Raygun
Honor Guard [HP: 631] [Type: Aggressive]
Quote: Note: Looks like the Squad Leader but stronger. Can be found guarding the commander’s base.
Drop(s): Charge Orb, Kevlar
Ring(s): None
Recipe(s): Green Alien Tattoo
Predator Commander [HP: 2568] [Type: Aggressive]
Quote: Note: Takes a while for him to spawn.
If you need help killing this guy, MESSAGE ME! I will run like hell to help. I know how long it takes to kill this guy, so I am super willing to help.
Drop(s): Charge Orb, Fauxskin , Wetware Plastic
Ring(s): None
Recipe(s): Alien Raygun
Tiny Terror [HP: 205] [Type: Agressive]
Quote: Note: Does not count towards your normal badge. Will attack in packs.
Easy to kill here, but at the Otami Ruins, are very hard. Killing these guys won't do you anything.
Drop(s): Charge Orb
Now you should be off to Otami Ruins and its adjouring Cliffs. Or you can head over to the Gold Beach to do the Duneslam quest. Duneslam is a nice easy quest, if you can find a crew for it. Otami Ruins is very hard and long, and will be a true test of patient and hard work. Easy or Hard, what ever path you will choose, I will have a page for it! Go students, on to your third year!
------------------------------------------------------------------------------------------------------------------------------
The Hive World Recommended Year: 3
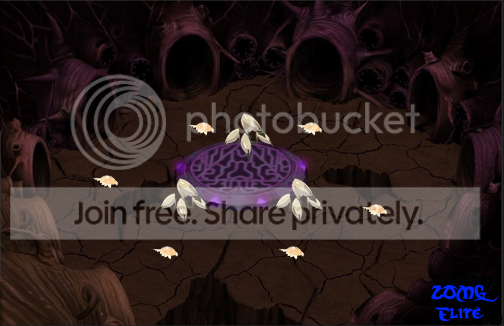
Quote: The hive (a.k.a. Star Portal) is an instance, located in the aqueduct. Essentially it's a sort of survival game where they throw wave after wave of increasingly difficult monsters at you, and see how far you can get. There is no end until you die.
Techically you have to be 5.0+ to get in. But you will die quickly and fast. Recommendation? Level up to 8.0+ and get a crew to go with you. Even on easy, it will get hard fast. You will also be scaled to the highest level in your group. If I go with you, and everyone else is leveled equally at 9.0, I would have to lower my own level, so we all don't die a firely, alieny death.
Alien Walker [HP: 838 - 900+][Type: Posion]
Quote: Note: Can poison you quickly depleting your hp. Landstrider's Acid Spray debuffs target’s footspeed. Landstrider can also be found outside the Hive Portal for mini-event.
Drop(s): Charge Orb,  Walker Leg Tip , Walker Leg Tip ,  Blue Pearl Blue Pearl
Ring(s): Shuriken , Fire Rain , Coyote Spirit , Teflon Spray , Divinity
Recipe(s):  Blue Alien Tattoo , Blue Alien Tattoo ,  Alien Armorskin , Alien Raygun Alien Armorskin , Alien Raygun
Badge(s):   
Landstrider [HP: 3060 - 3240+][Type: Posion]
Quote: Note: Can poison you quickly depleting your hp and Acid Spray debuffs target’s footspeed. Landstrider can also be found outside the Hive Portal for mini-event.
Drop(s): None
Ring(s): Hack , Shark Attack
Recipe(s): None
Shockroach [HP: 281 - 302+] [Type: Aggressive]
Quote: Note: Attacks in packs but easy to beat. Can now heal their allies and debuff the ACC of targets.
Drop(s): Charge Orb,  Bio-electric Bladder , Bio-electric Bladder ,  Tentacle Piece Tentacle Piece
Ring(s): Divinity , Scaredy Cat , Turtle , Meat
Recipe(s):  Bug Face-Hugger , Bug Face-Hugger ,  Alien Chest Burster Alien Chest Burster
Badge(s):   
Lightning Bug [HP: 680 - 720+] [Type: Aggressive]
Quote: Note: Attacks in packs but easy to beat. Can now heal their allies and debuff the ACC of targets. Lighting Bug can also be found outside the Hive Portal for mini-event.
Drop(s): Tentacle Piece
Ring(s): Improbability Sphere
Recipe(s): None
Deathroach [HP: 1250] [Type: Aggressive, Explosion]
Quote: Note: Will explode when close to you and appears more often after wave 45.
Drop(s): None
Ring(s): None
Recipe(s): None
------------------------------------------------------------------------------------------------------------------------------
|
|
|
|
|
|
|
|
|
|
|
|
|
|
|
|
|
|
Posted: Fri Sep 23, 2011 5:41 pm
Otami Ruins Recommended Year: 3
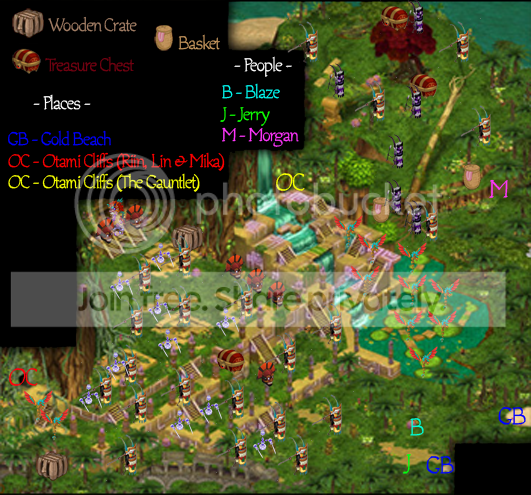
Quote: Long ago, there was a fierce civilization of warriors that built a huge empire in the area. So ferocious was their society that they tore themselves apart with their constant aggression. Eventually, the people themselves disappeared, leaving only their monolithic statues and ruins behind to tell their story. Jungles overgrow the entire area and what was once a massive city-state is now the home of monkeys and macaws.
I will say it. I hate this place (not all of it, its a pretty place). I hate the quests-cause they are freaking hard (and Shallows Seas compared to it-I am just saying why isn't Otami Ruins the final test!?). Some of them take forever and you can't buy the items you need to finish the quests (I know I have tried). You have to be at a certain level to get the items, or you won't get them at all (8.0 CL is the max level here).
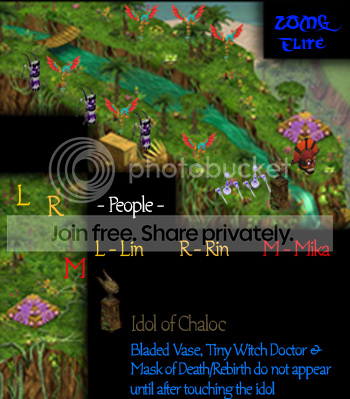
At some point, you will be sent to Rin and Lin. A set of twins, they are the only remnants of a strong civilization (they are the Myans of the world of Gaia). Their quests are the one where you have to find a certain items from different Animated, at a certain level, and you can't buy the items. Ya, this place will get your brain agoing, while making you hate the animated. Good Luck my students, as a Year 3, you will have tons of challenges here.
Animated:
Tiny Terror [HP: 367 - 388] [Type: Agressive]
Drop(s): Charge Orb,  Spear Head , Spear Head ,  Shield Fragment Shield Fragment
Ring(s): Shuriken , Scaredy Cat , Improbability Sphere , Guns, Guns, Guns , Bandage , Iron Will
Recipe(s):  Sharktooth Knife Sharktooth Knife
Badge(s):   
Tiny Witch Doctor [HP: 844] [Type: Agressive]
Quote: Note: Able to heal allies.
Drop(s): Charge Orb, Spear Head
Ring(s): Slash , Fitness, Divinity , Defibrillate
Recipe(s): None
Feathered Coatl [HP: 367 - 383] [Type: Flying]
Quote: Note: Debuffs Willpower on targets.
Drop(s): Charge Orb,  Tropical Bird Feather , Tropical Bird Feather ,  Damascus Damascus
Ring(s): Mantis , Iron Will , My Density , Healing Halo , Pot Lid , Scaredy Cat
Recipe(s):  Sailor's Mermaid Tattoo Sailor's Mermaid Tattoo
Badge(s):   
Blade Vase [HP: 367-393] [Type: Aggressive]
Quote: Note: Likes to spin around with blades. Has a short range attack. Debuffs Weight on targets.
Drop(s): Charge Orb,  Chain Link , Chain Link ,  Otami Mace Head Otami Mace Head
Ring(s): None
Recipe(s):  Lime Ring Pop Lime Ring Pop
Badge(s):   [ [
Mask of Death and Rebirth [HP: 1605] [Type: Long Range]
Quote: Note: Mask shatters twice. Second mask is blue and third mask is purple. Can root you to the ground. Ranged ring attack recommended. Has VERY long range attack.
I hate these guys. I think everyone does. The Jewel Eye is a quest item that you will have to get, and it will drop....after awhile. Sometimes you get this item right away, but if you are like me, it will take you about 3-5 days (2 hours on zOMG each). If you need any help with this guy, message asap. I will come a running!
Drop(s): Charge Orb,  Carbon , Carbon ,  Jewel Eye Jewel Eye
Ring(s): Heavy Water Balloon
Recipe(s):  Otami Jewelry Otami Jewelry
Badge(s):   
Ok, hopefully you have gotten to Rin and Lin's final quest for you. You will have to go to the Throne Room. If you need a crew for it, pm me, I will come and help.
------------------------------------------------------------------------------------------------------------------------------
The Throne Room Recommended Year: 3

A another place for a crew. This Room will have the final boss infront of you, taunting you to kill it. You can't till all his Masks of Death and Rebirth are dead. And before you can kill them, a wave of Feathered Coat'l, Tiny Terrors, and Witch Doctors will attack you. Remember to have everyone at the same level (9.0 or 8.9- doesn't matter as long as everyone is the exact same CL to each other).
I wish you luck my 3rd year students, as this is your first test as a 3rd Year.
Stone Coatl [HP: ???] [Type: Aggressive]
Quote: Note: Boss for Otami Ruins. Must beat before you can enter Shallow Sea by yourself. Second attack debuffs accuracy. Third (final) attack debuffs Dodge.
Drop(s): Charge Orb
Ring(s): None
Recipe(s):  Otami Upper Armor , Otami Upper Armor ,  Otami Shield Otami Shield
------------------------------------------------------------------------------------------------------------------------------
Congrats, my students! You have completed Otami Cliffs and Ruins! A difficult place for sure, but now you can go onto Gold Beach and its Shallow Seas.
Or you can check out the Hive World again. Either way, your journey is about to be over.
(And your graduation is coming closer!)
|
|
|
|
|
|
|
|
|
|
|
|
|
|
|
Posted: Fri Sep 23, 2011 5:42 pm
Gold Beach Recommended Year: 3
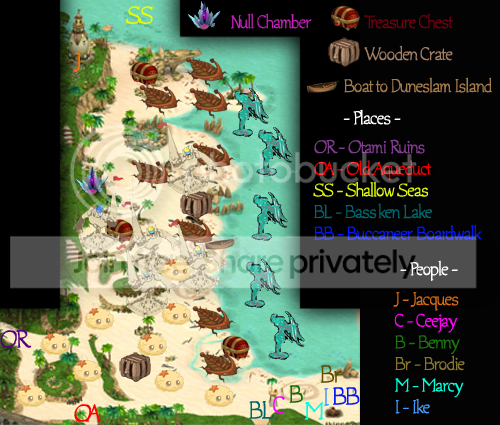
Quote: This popular tourist beach is golden sand next to gentle lagoon-like waves. Surfers paddle far out past the barrier reef to catch the bigger waves there, and they swear that the rides are worth the effort. A lighthouse stands high over the beach, warning ships about the reef so they don't add to the countless shipwrecks found throughout the Shallow Sea.
The Null is on top of a cliff stucture, and if you timed it right, there is a large group of students surrounding it. That is for the Shallow Seas. The quests here are simple at best, when you have just left Otami Cliffs. You should do Duneslam Island before Shallow Seas. But if you really want to, you can do Shallow Seas with me, if not you could drown. If you do, please PM me and we will do your last test together. (Please go to the Shallow Seas page for more infomation)
Animated:
Sand Castle Golem [HP: 358 - 381] [Type: knock back]
Quote: Note: Normally attacks with their lance but will dive under the sand if you attack them with a ranged weapon or try to run away.
Drop(s): Charge Orb,  Seashell , Seashell ,  Gold Gold
Ring(s): Taunt , Hornet's Nest
Recipe(s):  Shell Collection , Shell Collection ,  Cat's Eye Sunglasses Cat's Eye Sunglasses
Badge(s):   
Sandblast [HP: 1632] [Type: Knock Back]
Quote: Note: Wears a dark blue bucket on his head. The normal version can be found a few screens south of the null crystal.
Drop(s): Charge Orb, Seashell , Gold
Ring(s): None
Recipe(s): Shell Collection , Cat's Eye Sunglasses
Water Spout [HP: 323 - 371] [Type: Agressive]
Quote: Note: Come out at night and will attach if you get too close.
Drop(s): Charge Orb,  Tropical Flower , Tropical Flower ,  Trident Head Trident Head
Ring(s): My Density
Recipe(s):  Lei , Lei ,  Tropical Sarong Tropical Sarong
Badge(s):   
Anchor Bug [HP: 353 - 392] [Type: Range Attack]
Quote: Note: Can hit you from a short distance and found in large swarms. Rings that can attack more than one monster at a time recommended if by yourself.
Remember these guys? Never went to the Boardwalk? Well, here they are again, and you can see them also at the Boardwalk! Easy to kill, somewhat and if you need to rage up, a good animated to kill.
Drop(s): Charge Orb, Lobster Claw , Brass , Sailor Ink
Ring(s): Bandage
Recipe(s): Monster Lobster Claws , Sailor's Anchor Tattoo , Forum Badge (QA)
Badge(s):
Sand Fluff [HP: 264 - 290] [Type: Ranged Attack]
Quote: Note: Does not attack unless provoked. Debuffs footspeed but can be countered with Coyote Spirit and/or Fleet Feet. Ranged ring attack highly recommended when fighting by yourself. Will also aid other nearby Sand Fluffs being attacked.
Drop(s): Charge Orb,  Synthetic Fiber , Synthetic Fiber ,  Glass , Glass ,  Teflon Teflon
Ring(s): Iron Will , Diagnosis , Mantis , Rock Armor , Healing Halo , Guns, Guns, Guns , Fire Rain
Recipe(s):  Sand Fluff Plushie , Sand Fluff Plushie ,  Sun Block , Tropical Sarong Sun Block , Tropical Sarong
Badge(s):   
Land Shark [HP: ???] [Type: Aggressive]
Quote: Note: Very rare monster. Can be seen by huge chipped fin moving above the sand. Has very long range of attack and crew strongly recommended. Do not attempt to kill by yourself. Currently being investigated on what exactly makes Land Shark spawn. Must now be 7.0 to do any damage to it but landshark can still hurt you regardless of your cl level. Can now cause targets to run away.
I have only ever seen the Land Shark as a summon. I never seen it in a mini-event. I wonder if I will ever...
Drop(s): Charge Orb,  Surfboard Fin Surfboard Fin
Ring(s): None
Recipe(s): Tropical Sarong , Sand Fluff Plushie , Lei , Shell Collection ,  Blue Wing Surfboard , Sun Block Blue Wing Surfboard , Sun Block
Predator Prairie Pup [HP: 281 - 318] [Type: Aggressive]
Quote: Note: Does not count towards your normal badge.
For a mini-event.
Badge(s):  
If you figured out the quest, then you should be able to head to Duneslam Island! Yay...I think. Its not a very interesting place.
------------------------------------------------------------------------------------------------------------------------------
Duneslam Island Recommended Year: 3
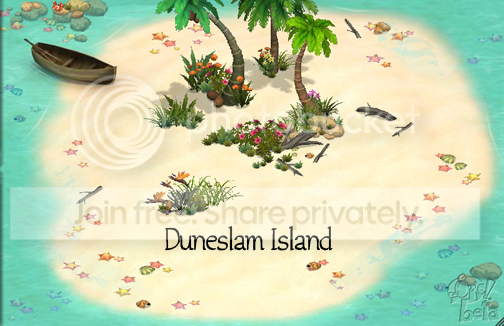
Oh yay, the boat has taken us to a small island with nothing interesting. Even the boss fight is lame, just keep killing the Sand Golems, then Duneslam will come out and kill him, bam you are done.
Animated:
Duneslam [HP: ? - ?] [Type: knock back]
Quote: Note: Found on Duneslam Island.
Drop(s): Same as Sandblast
Ring(s): Fire Rain , Slash
Recipe(s): Same as Sandblast
------------------------------------------------------------------------------------------------------------------------------
So finishing up Duneslam, either go to Otami Ruins or if you already have done Otami Ruins,like me, you will head toward Shallow Seas.
Getting a crew is tough, especally if your server isn't every active. I will explain nicknames for Shallow Seas in the Shallow Seas page. This will be your last test as a Third Year, and possibly your graduation test.
More infomation is coming along with your graduation test. But please if you are doing Shallow Seas, and you have killed the end boss, take a pic of the NPCs talking to you at the end. It will verify you have done it correctly and all.
To Shallow Seas!
|
|
|
|
|
|
|
|
|
|
|
|
|
|
|
|
|
|
Posted: Fri Sep 23, 2011 5:44 pm
Shallow Seas Recommended Year: 3
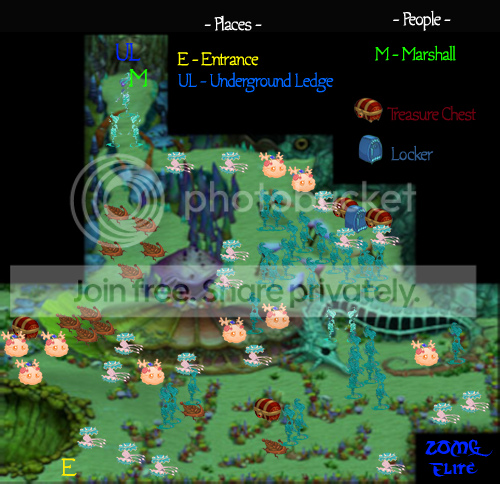
Shallow Seas....Your last test....And where I am mostly seen at. Shallow Seas, or SS, is a great way to get 20K quickly (by doing SMOB or SS mob-Doing all the chests and killing almost all the animated). Well. To make things simpler, here is a small list of SS words you have to know.
Quote: Words You Need To Know:~SS: Shallow Seas ~EB: End Boss ~SMOB: SS mob, aka doing all the chests-no skipping. ~SMEB: SS and EB mob ~RF: Ring Farming, where you go to Sealab Compound to get 18.6+ Rings. If you have noticed that some people are over 10.0 (like me-I am 15.0 CL), this is how they get over-by RFing. [You can no longer get rings like this. Must wait for Dead Man's Shadow] ~Reserved ~Reserved ~Reserved
If I can think of more, I willl edit this and post it.
Anyway, getting a crew for EB is a HUGE challenge, as most people just rather do RF or SMOB. It also doesn't help that it takes about 2 hours to do EB, and some members leave after a while. (The Best crew would be one that has no members leaving at any point, and they work together well).
If you can, get 4 other students and me to come with you to do EB. I have longed to go back to EB, since I first did it. (I sadly have only done it once....)
After defeating the EB, you will get to choose any ring that is 10.0 CL. Sweetheart and Fortune's Favor are the only rings you have to buy (You will only find it doing Holiday Events).
This is also (possibly) your graduation test. So, if you do defeat the EB, please take a pic of you choosing a lvl 10.0 CL ring. You will know when to take the pic. (Press ctrl + Print Scrn to take pic)
Good Luck!
Animated:
Brain Clam [HP: 1876] [Type: Short Range Attack]
Quote: Note: Debuffs ACC long-term. Ranged ring attack recommended.
Drop(s): Charge Orb,  Pearl , Pearl ,  Clamshell Clamshell
Ring(s): Dervish , Pot Lid , Divinity , Hack , Bump , Bandage , Guns, Guns, Guns , Meat , Diagnosis , Improbability Sphere , Taunt
Recipe(s):  Clam Shell Purse Clam Shell Purse
Badge(s):   
Sea Anchor Bug [HP: 753] [Type: Short Range Attack]
Quote: Note: Will attack in packs.
Drop(s): Charge Orb, Lobster Claw , Brass , Sailor Ink
Ring(s): Ghost , Heavy Water Balloon
Recipe(s): Monster Lobster Claws , Sailor's Anchor Tattoo , Forum Badge (QA)
Barnaclue Fluff [HP: 1537] [Type: Life Leecher]
Quote: Note: Will come after you as soon as you get close enough and immobilize you.
Drop(s): Charge Orb,  Graphite , Graphite ,  Starfish Starfish
Ring(s): Pot Lid , Keen Aye , Coyote Spirit , Dervish , Hot Foot , Shark Attack , Solar Rays , Bandage , Rock Armor , Wish , Gumshoe , Fitness, Diagnosis
Recipe(s):  Coral Fluff Plushie Coral Fluff Plushie
Badge(s):   
Sea Sprout [HP: 912] [Type: Aggressive]
Quote: Note: Attacks in hordes. Some will run to get help. Number of monsters depends on how many in your crew.
Drop(s): Charge Orb,  Sword Blade , Sword Blade ,  Seaweed Seaweed
Ring(s): Shuriken , My Density , Teflon Spray , Turtle , Hunter's Bow , Taunt , Bump
Recipe(s):  Seaweed Hair , Seaweed Hair ,  Water Trident Water Trident
Badge(s):   
Partenhope and Thelchtereia [HP: 2046] [Type: Aggressive]
Quote: Note: Can be found by the neck of the Sea Horse.
Drop(s): Charge Orb, Sword Blade
Ring(s): None
Recipe(s): Seaweed Hair , Water Trident
Raidne and Aglaope [HP: 2046] [Type: Aggressive]
Quote: Note: Protects Queen Lorelai.
Drop(s): Charge Orb
Ring(s): None
Recipe(s): None
Queen Lorelai [HP: 8173] [Type: Agressive]
Quote: Note: Must beat her before you can get to the Undersea Ledge.
If you went to the Queen and have not defeated the Fluffs by the weird Eye thingy on the wall, you will be seeing a 20.6 Queen. You will die quickly. If not, please message me with that infomation. It might have changed since the last update to zOMG.
Drop(s): Charge Orb, Sword Blade
Ring(s): Diagnosis
Recipe(s): Seaweed Hair , Water Trident
------------------------------------------------------------------------------------------------------------------------------
Undersea Ledge Recommended Year: 3
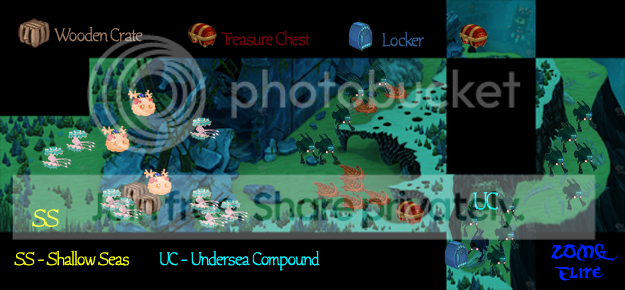
A beautiful place, I must admit. But other than the wonderful scenery, nothing is really here. There is a nice backstory to the city underwater, but you, my students, will find that out your self.
Animated:
Brain Clam [HP: 1876] [Type: Short Range Attack]
Quote: Note: Debuffs ACC long-term. Ranged ring attack recommended.
Drop(s): Charge Orb, Pearl , Clamshell
Ring(s): Adrenaline, Scaredy Cat , Dervish , Pot Lid , Keen Aye , Mantis , Solar Rays
Recipe(s): Clam Shell Purse
Badge(s):
Sea Anchor Bug [HP: ???] [Type: Short Range Attack]
Drop(s): Charge Orb, Lobster Claw , Brass , Sailor Ink
Ring(s): None
Recipe(s): Monster Lobster Claws , Sailor's Anchor Tattoo , Forum Badge (QA)
Grunny Sub [HP: ???] [Type: Medium Range Attack]
Quote: Note: Guards the entrance to the compound.
Drop(s): Charge Orb,  Harpoon , Harpoon ,  Spring Spring
Ring(s): Adrenaline, Shark Attack
Recipe(s):  Antique Diving Gear Antique Diving Gear
Badge(s):   
Grunny Command Sub [HP: ???] [Type: Medium Range Attack]
Quote: Note: Must first beat before the locker can be opened.
Drop(s): Charge Orb
Ring(s): None
Recipe(s): None
------------------------------------------------------------------------------------------------------------------------------
Walkway to Sealab Compound Recommended Year: 3

On your map, there is nothing to show. I could have taken wonderful pics of the Walkway, but there would be too many to take, and I want all of you not to get too many spoilers right?
Animated:
Grunny Sub [HP: ???] [Type: Medium Range Attack]
Quote: Note: Found at the end of the walkway.
Drop(s): Charge Orb, Harpoon , Spring
Ring(s): None
Recipe(s): Antique Diving Gear
Badge(s):
Robofish [HP: ???] [Type: Very Aggressive]
Quote: Note: Robofish hide and only show their lanterns until they spot you, then they attack. Can now give you "The Willies" as an alternative attack (fear).
Drop(s): Charge Orb,  Fish Scale , Fish Scale ,  Diving Tank Diving Tank
Ring(s): Gumshoe , Coyote Spirit , Mantis , Fleet Feet , Turtle , Divinity , Meat
Recipe(s):  Pearls , Pearls ,  Lionfish Tail , Lionfish Tail ,  Starfish , Starfish ,  Orca Tail Orca Tail
Badge(s):   
------------------------------------------------------------------------------------------------------------------------------
Sealab Compound Recommended Year: 3
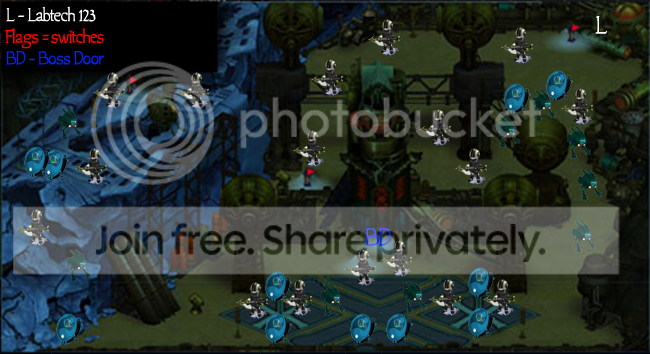
If you look closely at Labtech 123 and the G-Corp Labtech in the Old Aqueduct, you will find them to be alot alike. Whether they are one and the same person just purely speculation (Either the Gaia Gods made them look alike on purpose or they just ran out of NPCs...)
The story here is very interesting but you, my students, will find out what that story is yourself. My advice for this place? Listen to your elder classmates. They have probably done this before or have gotten to RF, so they have better knowledge of this place than you do.
I wish you luck.
Animated:
Labtech [HP: ???] [Type: Medium Range Attack]
Quote: Note: Easy to beat compared to his sister, Labtech Jumper.
Drop(s): Charge Orb,  Silver Silver
Ring(s): Shuriken
Recipe(s): None
Labtech Jumper [HP: ???] [Type: Medium Range Attack]
Quote: Note: Stronger than little Labtech brother. Can heal allies and self.
Drop(s): Charge Orb,  Platinum Platinum
Ring(s): Healing Halo , Hack
Recipe(s): None
Seacycles [HP: ???] [Type: Medium Range Attack]
Quote: Note: One of the harder ones to beat in compound.
Drop(s): Charge Orb,  Mythrill , Silver Mythrill , Silver
Ring(s): Solar Rays , Divinity , Ghost
Recipe(s): None
Grunny Sub [HP: ???] [Type: Medium Range Attack]
Quote: Note: Usually found in groups of 2-3.
Drop(s): Charge Orb, Spring
Ring(s): Hot Foot , Keen Aye , Slash
Recipe(s): None
------------------------------------------------------------------------------------------------------------------------------
End Boss Room Recommended Year: 3
Good Luck-From Professor Mark Sarrasri
Animated:
Deathmine [HP: ???] [Type: Self Destruct]
Quote: Note: Can be found helping Labtech X as you battle him. No warning when they will appear and if you get caught, you’re dead. They self destruct so you don’t even attack them. Debuffs dodge.
Sealab X [HP: Tail = ? / Body = 37,281 / Arms = 18,910] [Type: ???]
Quote: Note: After hearing a speech by Labtech X, he disappears and you see the tail of Sealab X. After defeating the tail, the Left Arm + Body + Right Arm of Sealab X will come out together (they stay together) but they count as three separate mobs you can target. Hint: Attack the body, forget about the arms. If that wasn’t enough, Grunny Command Subs will appear randomly and after the tail is defeated, you will get bombarded by missiles. All is not lost though. One thing of note is that Sealab X cannot reach the far left wall - while it's targeting someone, everyone else can attack it - missiles kill pretty quick though - but doesn't realize when someone is dead so you can leave a dead person to be missile bait (they do splash damage). Hitting the body will still cause a quick death though. Missiles now debuff dodge, Tail roots target and Body can sometimes put you to sleep if hit.
Labtech X [HP: 25,217] [Type: ???]
Quote: Note: After beating Sealab X, you must now fight Labtech X as he pilots a ship. Beat this bad a** and get a random 1 of 4 recipes as a prize. You will also be awarded a nice small amount of gold for beating him as well. Crew recommended but is he really the last boss in the game? hmmm.....
Drop(s): Charge Orb
Recipe(s):  Null Fluff Plushie , Null Fluff Plushie ,  Crystal Fluff Plushie , Crystal Fluff Plushie ,  Mechlab Bot , Mechlab Bot ,  Sinister Scarf Sinister Scarf
------------------------------------------------------------------------------------------------------------------------------
Congrats Student! You have gotten to The End. Or is it? Well, it is for now. You can now do anything in the outside world without my help. Go back home with your lumps of cash and go shopping! Or go to the nearby Wizarding Village. You have all the time in the World. My final advice? For easy and quick gold, do PS (Papa Saw) on Hard. To get 20k quickly- do SMOB. Its what I do. Continue reading this book, and you will see the recipes you will have to do for my class. I hope you enjoyed this chapter (its a really looonngg one, eh?). To quote a very logical man, I will leave you with this. "Live long and prosper!"
(Only goodbye I could think of, since you should Live long and prosper...)
|
|
|
|
|
|
|
|
|
|
|
|
|
|
|
Posted: Fri Sep 23, 2011 5:49 pm
Chapter 3: Recipes for Each Year
First Year Recipes
------------------------------------------------------------------------------------------------------------------------------
|
|
|
|
|
|
|
|
|
|
|
|
|
|
|
|
|
|
Posted: Fri Sep 23, 2011 5:50 pm
------------------------------------------------------------------------------------------------------------------------------
------------------------------------------------------------------------------------------------------------------------------
------------------------------------------------------------------------------------------------------------------------------
|
|
|
|
|
|
|
|
|
|
|
|
|
|
|
|
|
|